If you have multiple images that you want to post in a series and not have to worry about formatting, the Gallery is the tool for you.
1. Add a New Block. You will probably need to use the search bar to find the Gallery block.

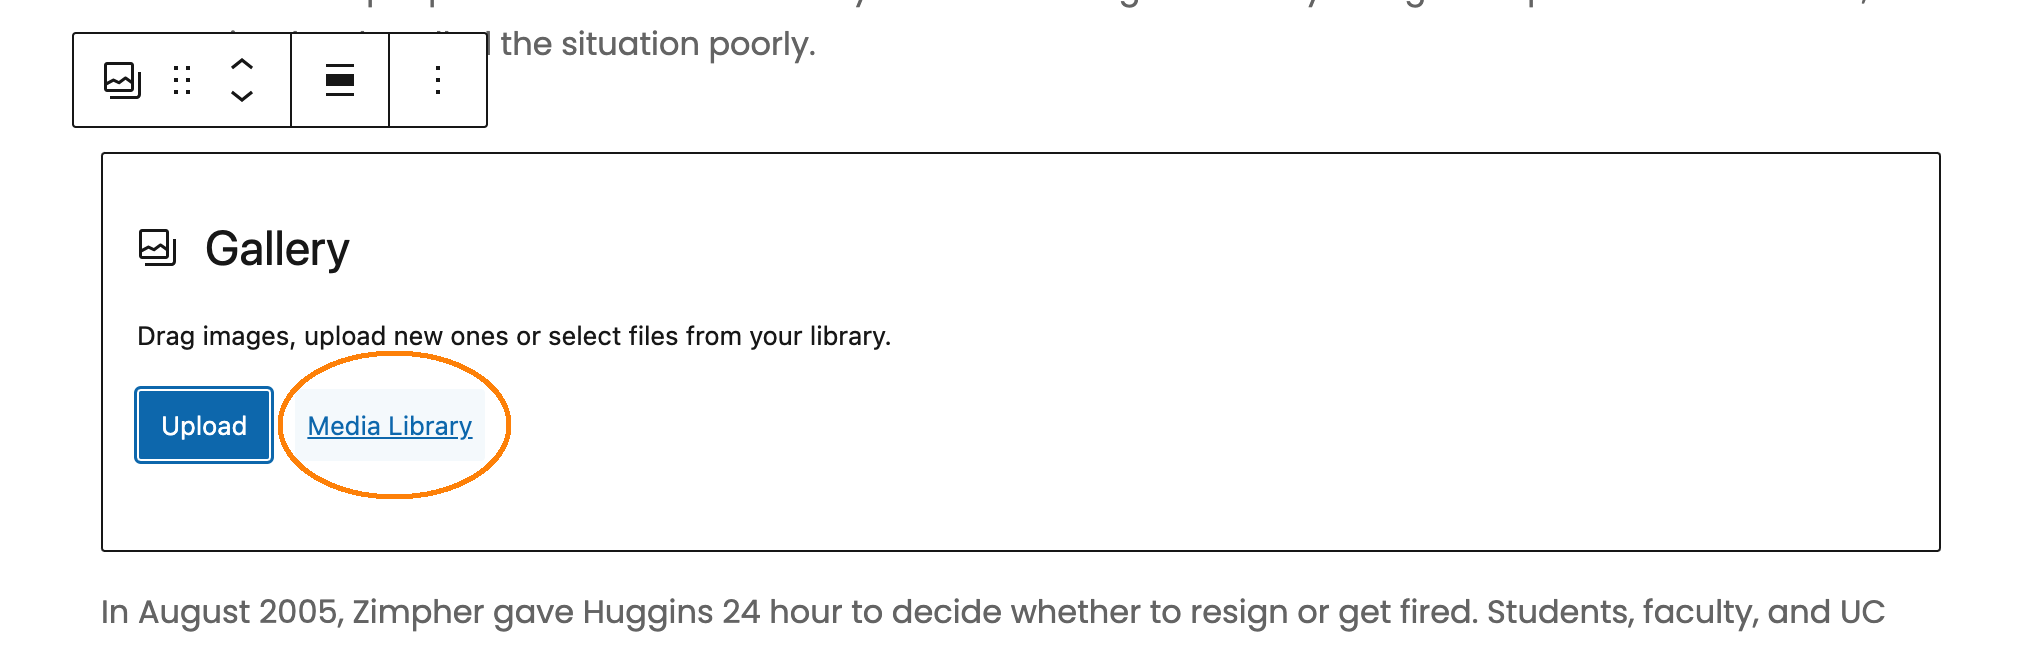
2. In your new Gallery block, select Media Library. For the same reasons I describe in Embedding Media – WordPress Block Editor, you do not want to choose the direct upload option. It does not save your Alt Text and caption. Alt Text is vital to accessibility.
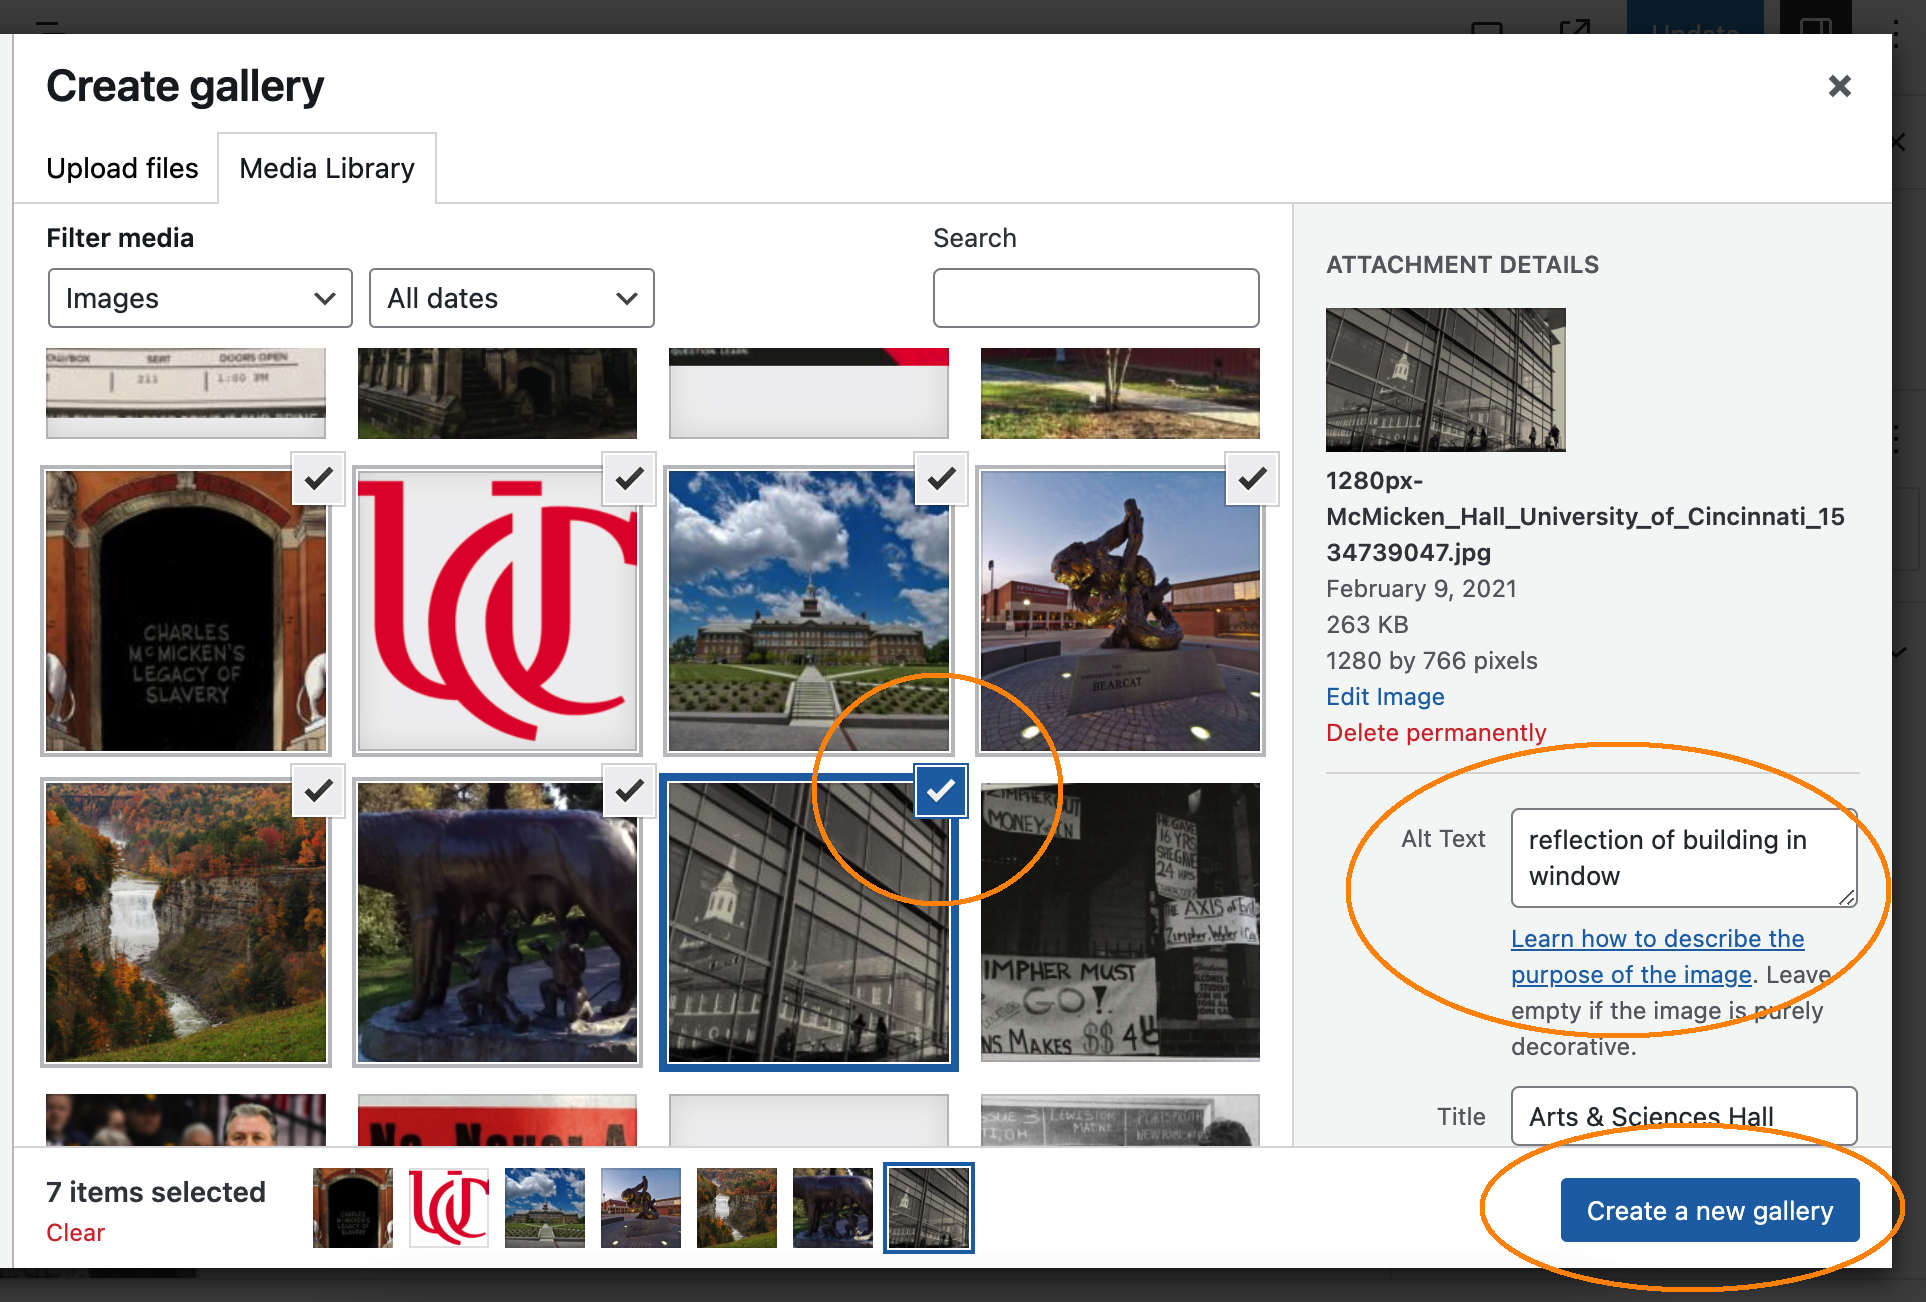
3. Once in the Media Library, select your media. The order does not matter at this point. Once selected, you will be able to adjust the Alt Text, Title, and Caption of each image. Selected images will have a checkmark in the upper right corner. When you have selected all your media, click the Create a New Gallery button.
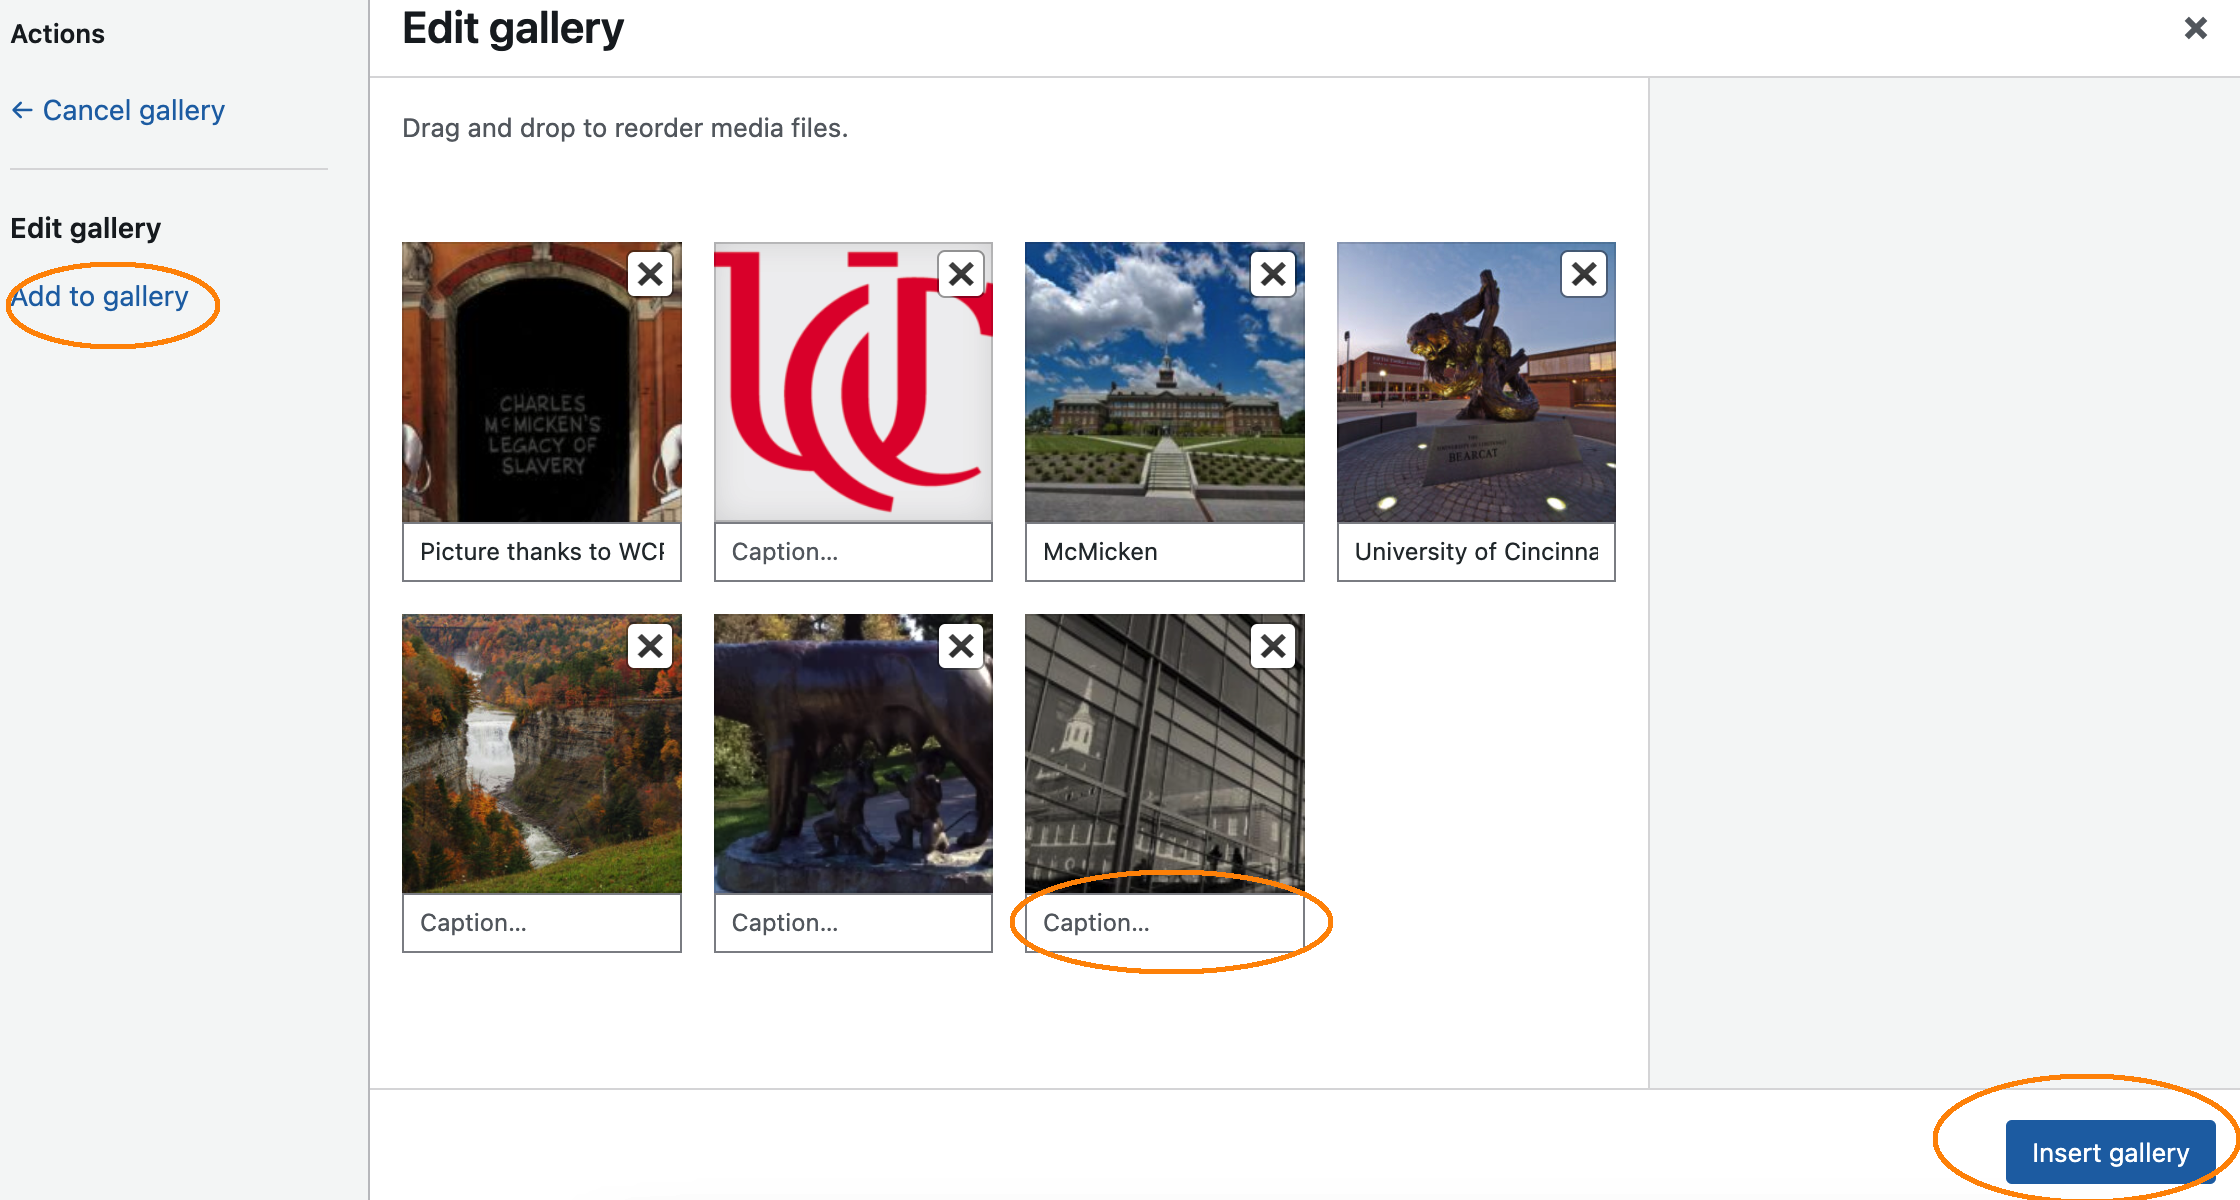
4. You can now Edit your Gallery. You can drag and reorder the images in your gallery, edit the captions, or add more media. When you are ready, press the Insert Gallery button.
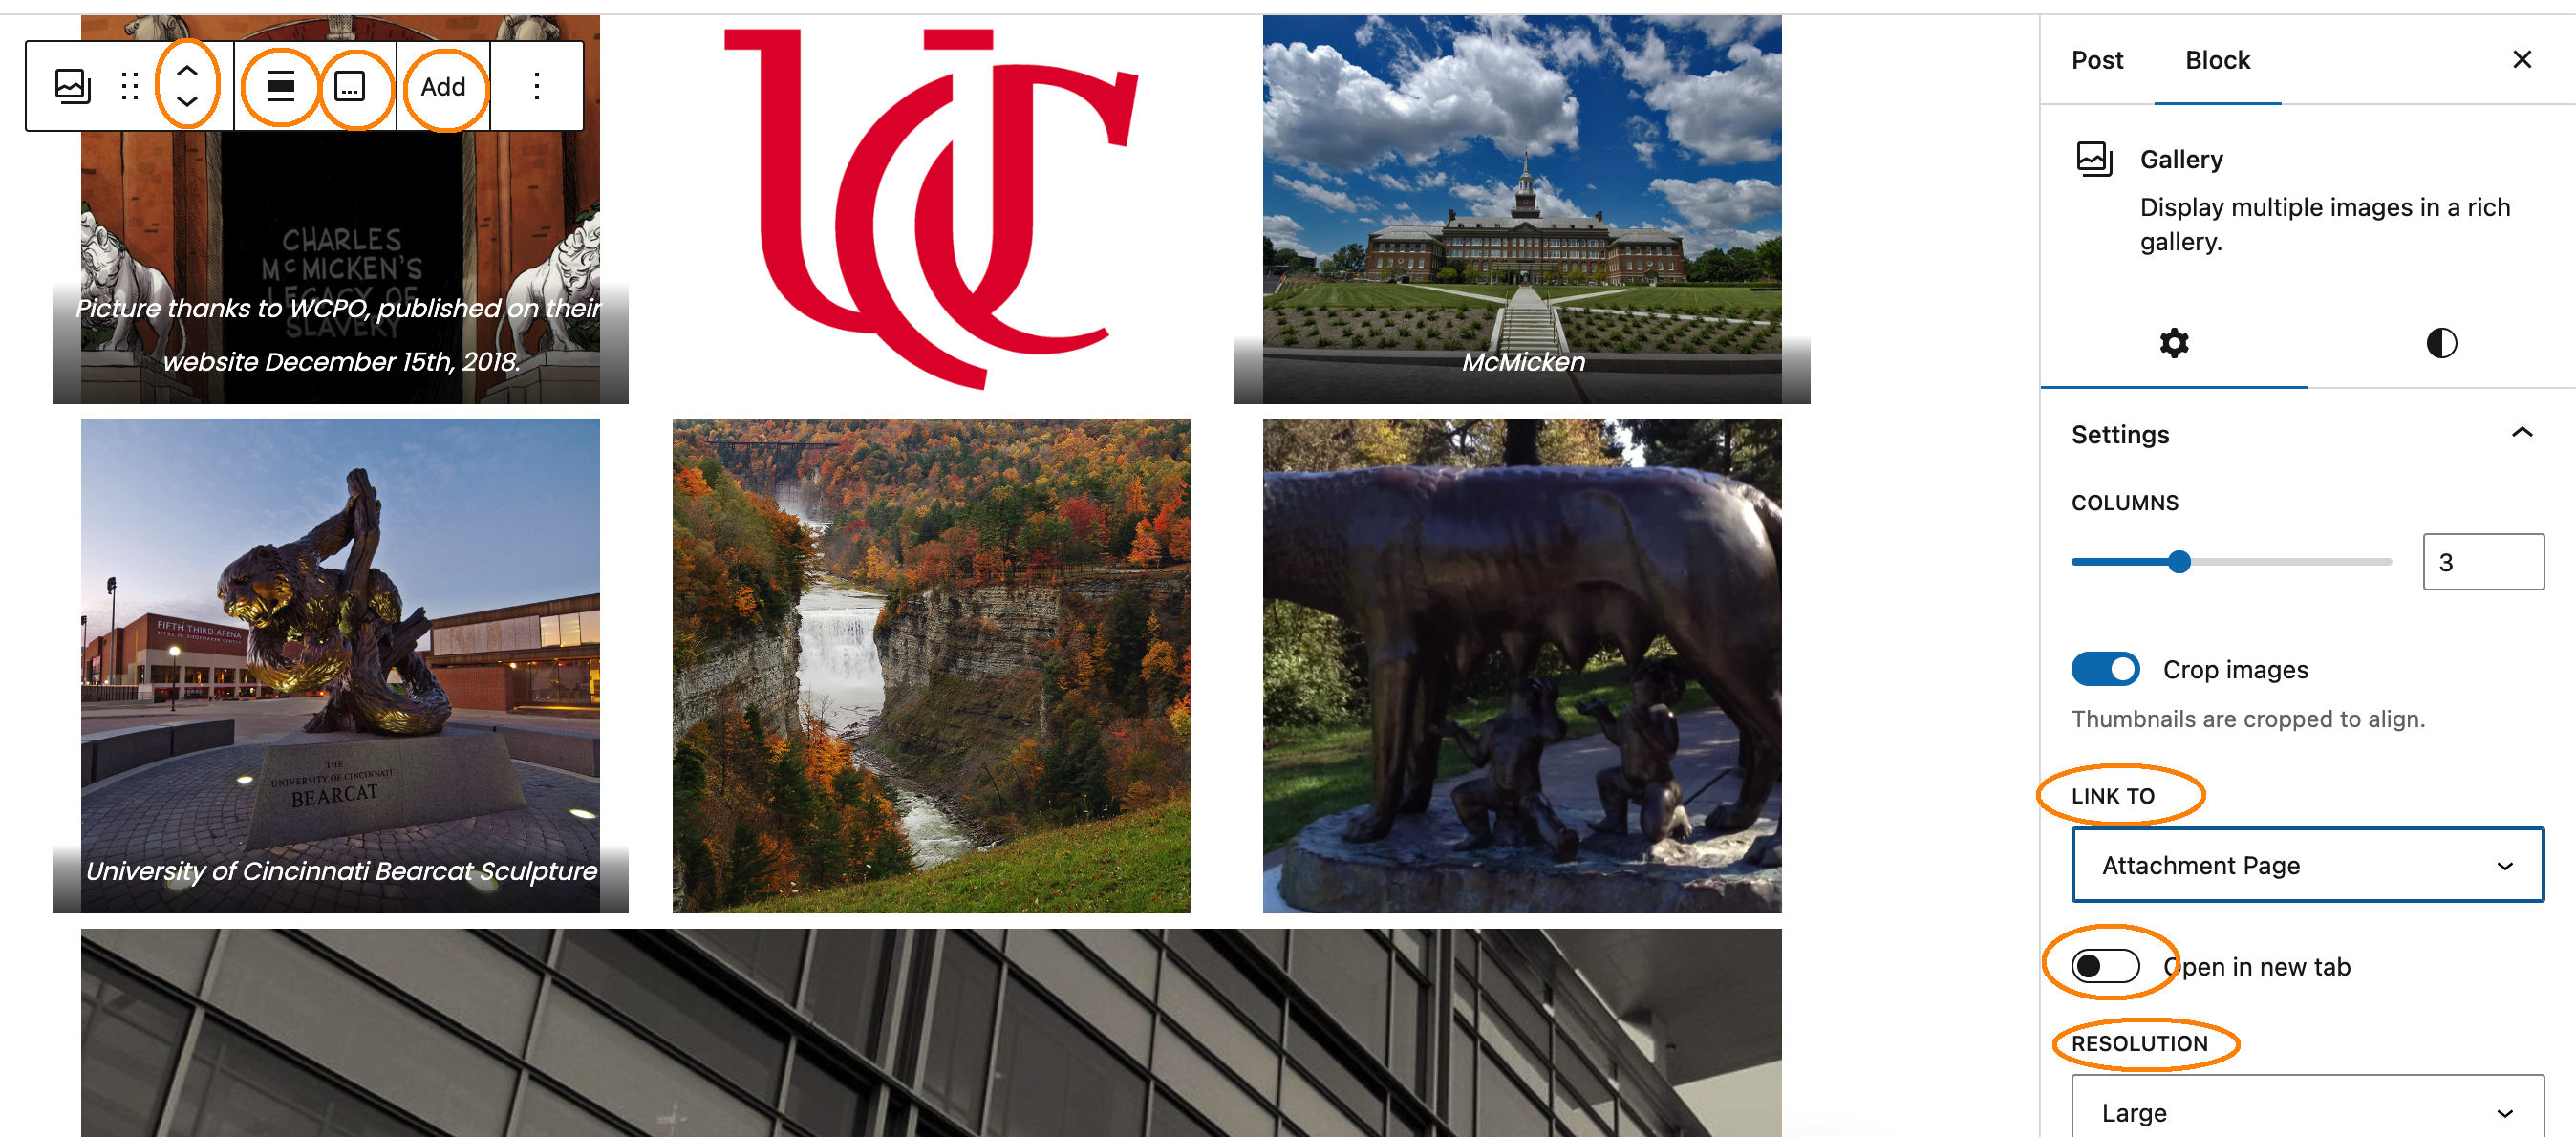
5. Your Gallery is now in your post or page. You can start to customize the Gallery. On the right sidebar, you can adjust the number of columns, crop, change the URL destination for the images, and adjust the resolution of each image. In the toolbar inside the block editor, you can adjust the alignment, the captions, add more media, or use the arrows to reorder your images.

6. Don’t forget to publish or update your page or post to save your changes. I also recommend viewing your page or post with the gallery so you can make sure it looks the way you want.