
Blogs are a highly visual platform and a lot of the WordPress Themes you can choose will show an image alongside your blog post. For instance, look at all the images on the Public History in the Wild blog. It is more appealing than text alone, and the images function kind of as click-bait to get people to select your post.

WordPress will not set these images without your instruction, however, so you must set your own Featured Image.
1. Choosing an Image. Your image should be something that is emblematic of your post and relevant to its content. Keep in mind that the size of this image is preset by the WordPress Theme and you have no control over the level of zoom. I recommend that you take your Featured Image in landscape mode as it is the least affected by the presets.
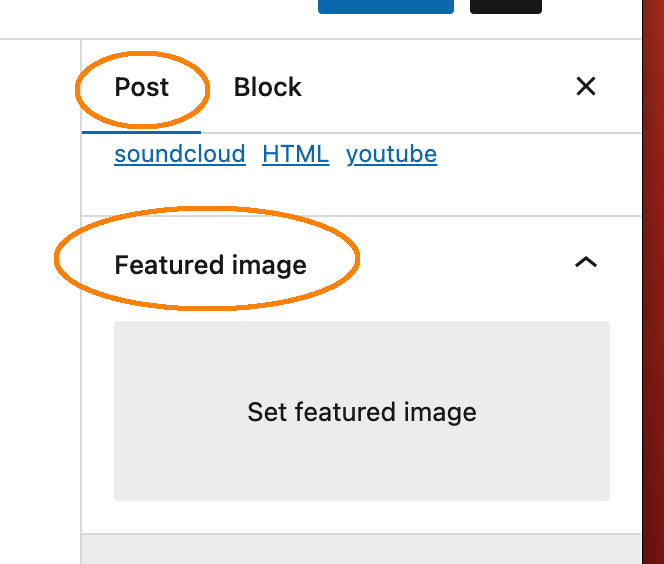
2. With the Post selected in the right sidebar, scroll all the way to the bottom — past the Categories and Tags and down to a box labeled Featured Image.
3. Click the grey box under Featured Image. This will open your Media Library. Select an image from the library or Upload Files. If you need more instructions on how to do this, review the instructions for Embedding Media – WordPress Block Editor.
4. Once you select your image, it will appear inside the grey box. Be sure to hit Update or Publish on your post!