These are instructions for embedding media in the Classic Editor. If you are using the Block Editor, please refer to those instructions as they differ.
The WYSIWYG interface is not as intuitive when it comes to embedding media as it is for authoring a Page or Post. There are two primary types of media that users commonly embed: 1) images or 2) other media.
Images
Choose where you want to embed your still image. Do you want the image to be centered and stand on its own? Do you want the text to wrap around the image?
Embedding an Image
- Click the “Add Media” button.
- Select an existing image from the Media Library or upload your own file.
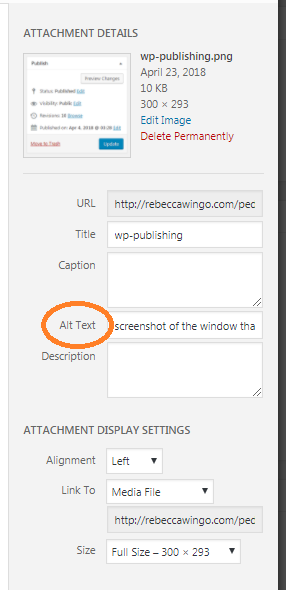
- Making sure your media file is accessible is one of the most important steps to uploading media. For instance, how would a blind person visiting your site know what your image contains? Filling out the “Alt Text” field will allow web readers to read a description of your image. Please read the Guidelines for Alt Text for more.
- You need to fill out all of the fields in the “Attachment Details” for your image. The “Description” field is where you can include all the information about the creator of the image, who owns the image, etc. The “Caption” field is the version of that information that will be visible to the public. Keep captions under 20 words and settle on a consistent style for the entirety of your project.
- Click “Insert into Page.”
How to Wrap Text
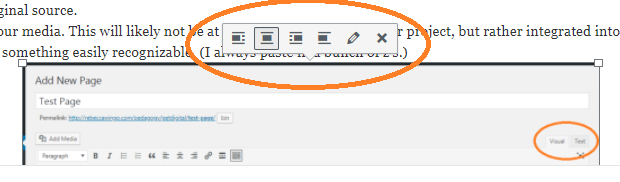
After you embed the media you have a few options for customization where you can start to think about the aesthetics of your page or post. Click on the image and use the toolbar that appears to change the orientation (left, center, right, or none). If you need more editing options (size, caption, alt text, etc), then click the “wheel” icon in the right toolbar for Additional Settings.

In the Additional Settings you can also determine the URL for the image (i.e. the image file, a different website, etc.) Follow the same rules for linking out for URLs: if it navigates internally to the website then you do not need a new tab; if it navigates externally, then direct the URL to open in a new window.
Tip: For later ease, you may want to develop your own file naming system. Everyone’s images will all become available in the media library. In order to find yours, you may want to “title” your image with your last name first and search by alphabetical order.
Other Media
Embedding media from other sites is slightly more difficult. The following steps should help:
- Copy the embed code from the original source.
- Choose where you want to embed your media. This will likely not be at the beginning or end of your project, but rather integrated into the body of your scholarship.
- Make a new paragraph and paste in something easily recognizable. (I always paste in a bunch of z’s.)
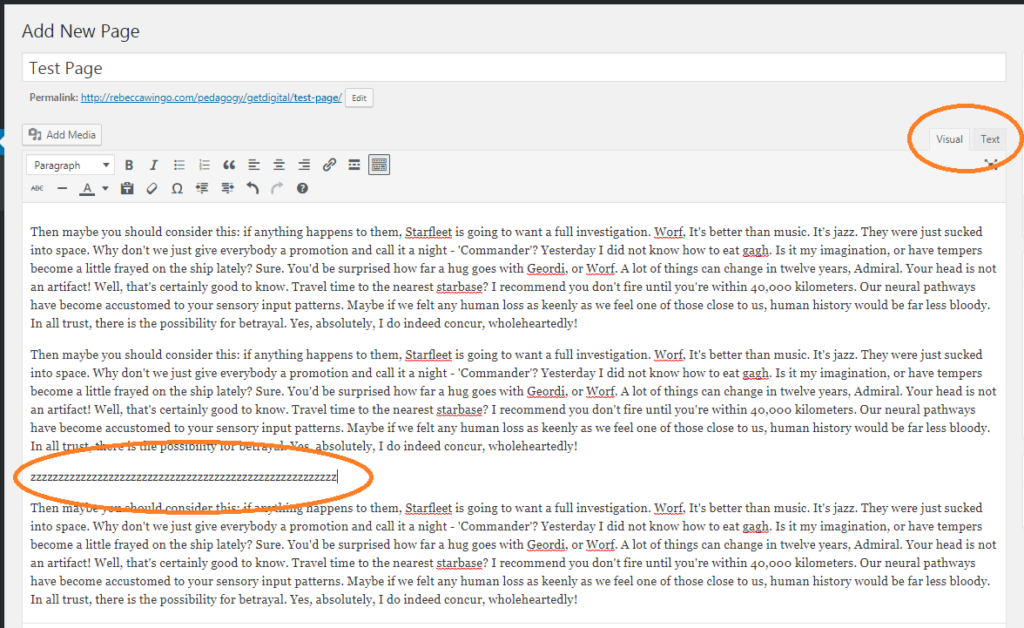
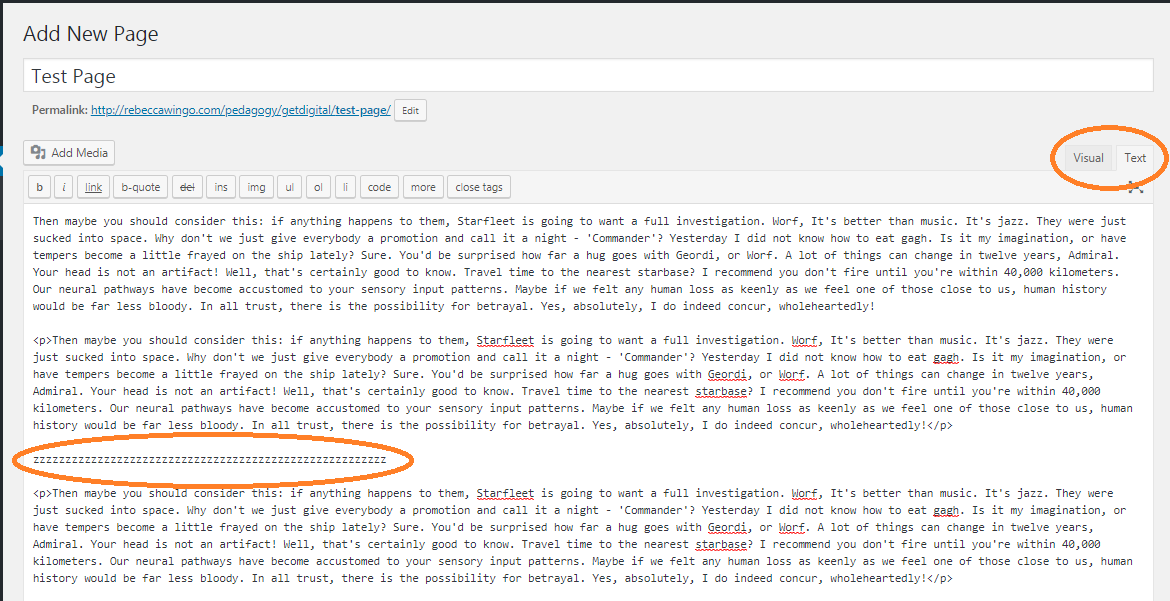
- Toggle over to the “Text” mode instead of “Visual” mode. This will allow you to edit the HTML directly.
- Locate your recognizable text. Delete it and paste in your embed code.
- Toggle back over to the “Visual” mode and preview the changes. Your embedded media should appear on the preview and live pages even if it appears as a broken link in the visual mode.